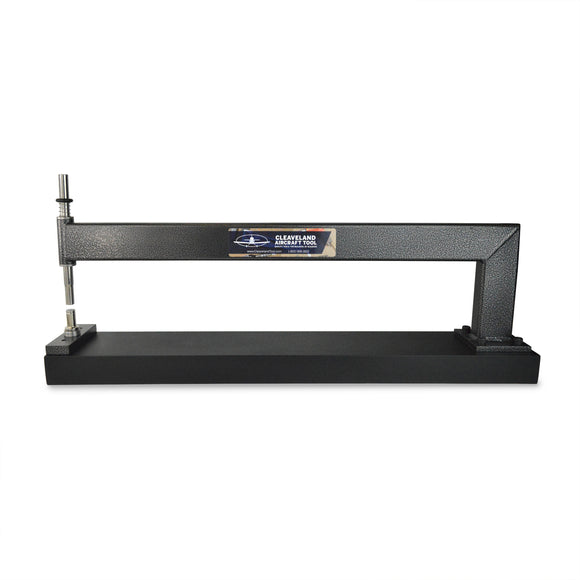


C-Frame Bench Dimpling Tool (SKU: CF80)
Product Description
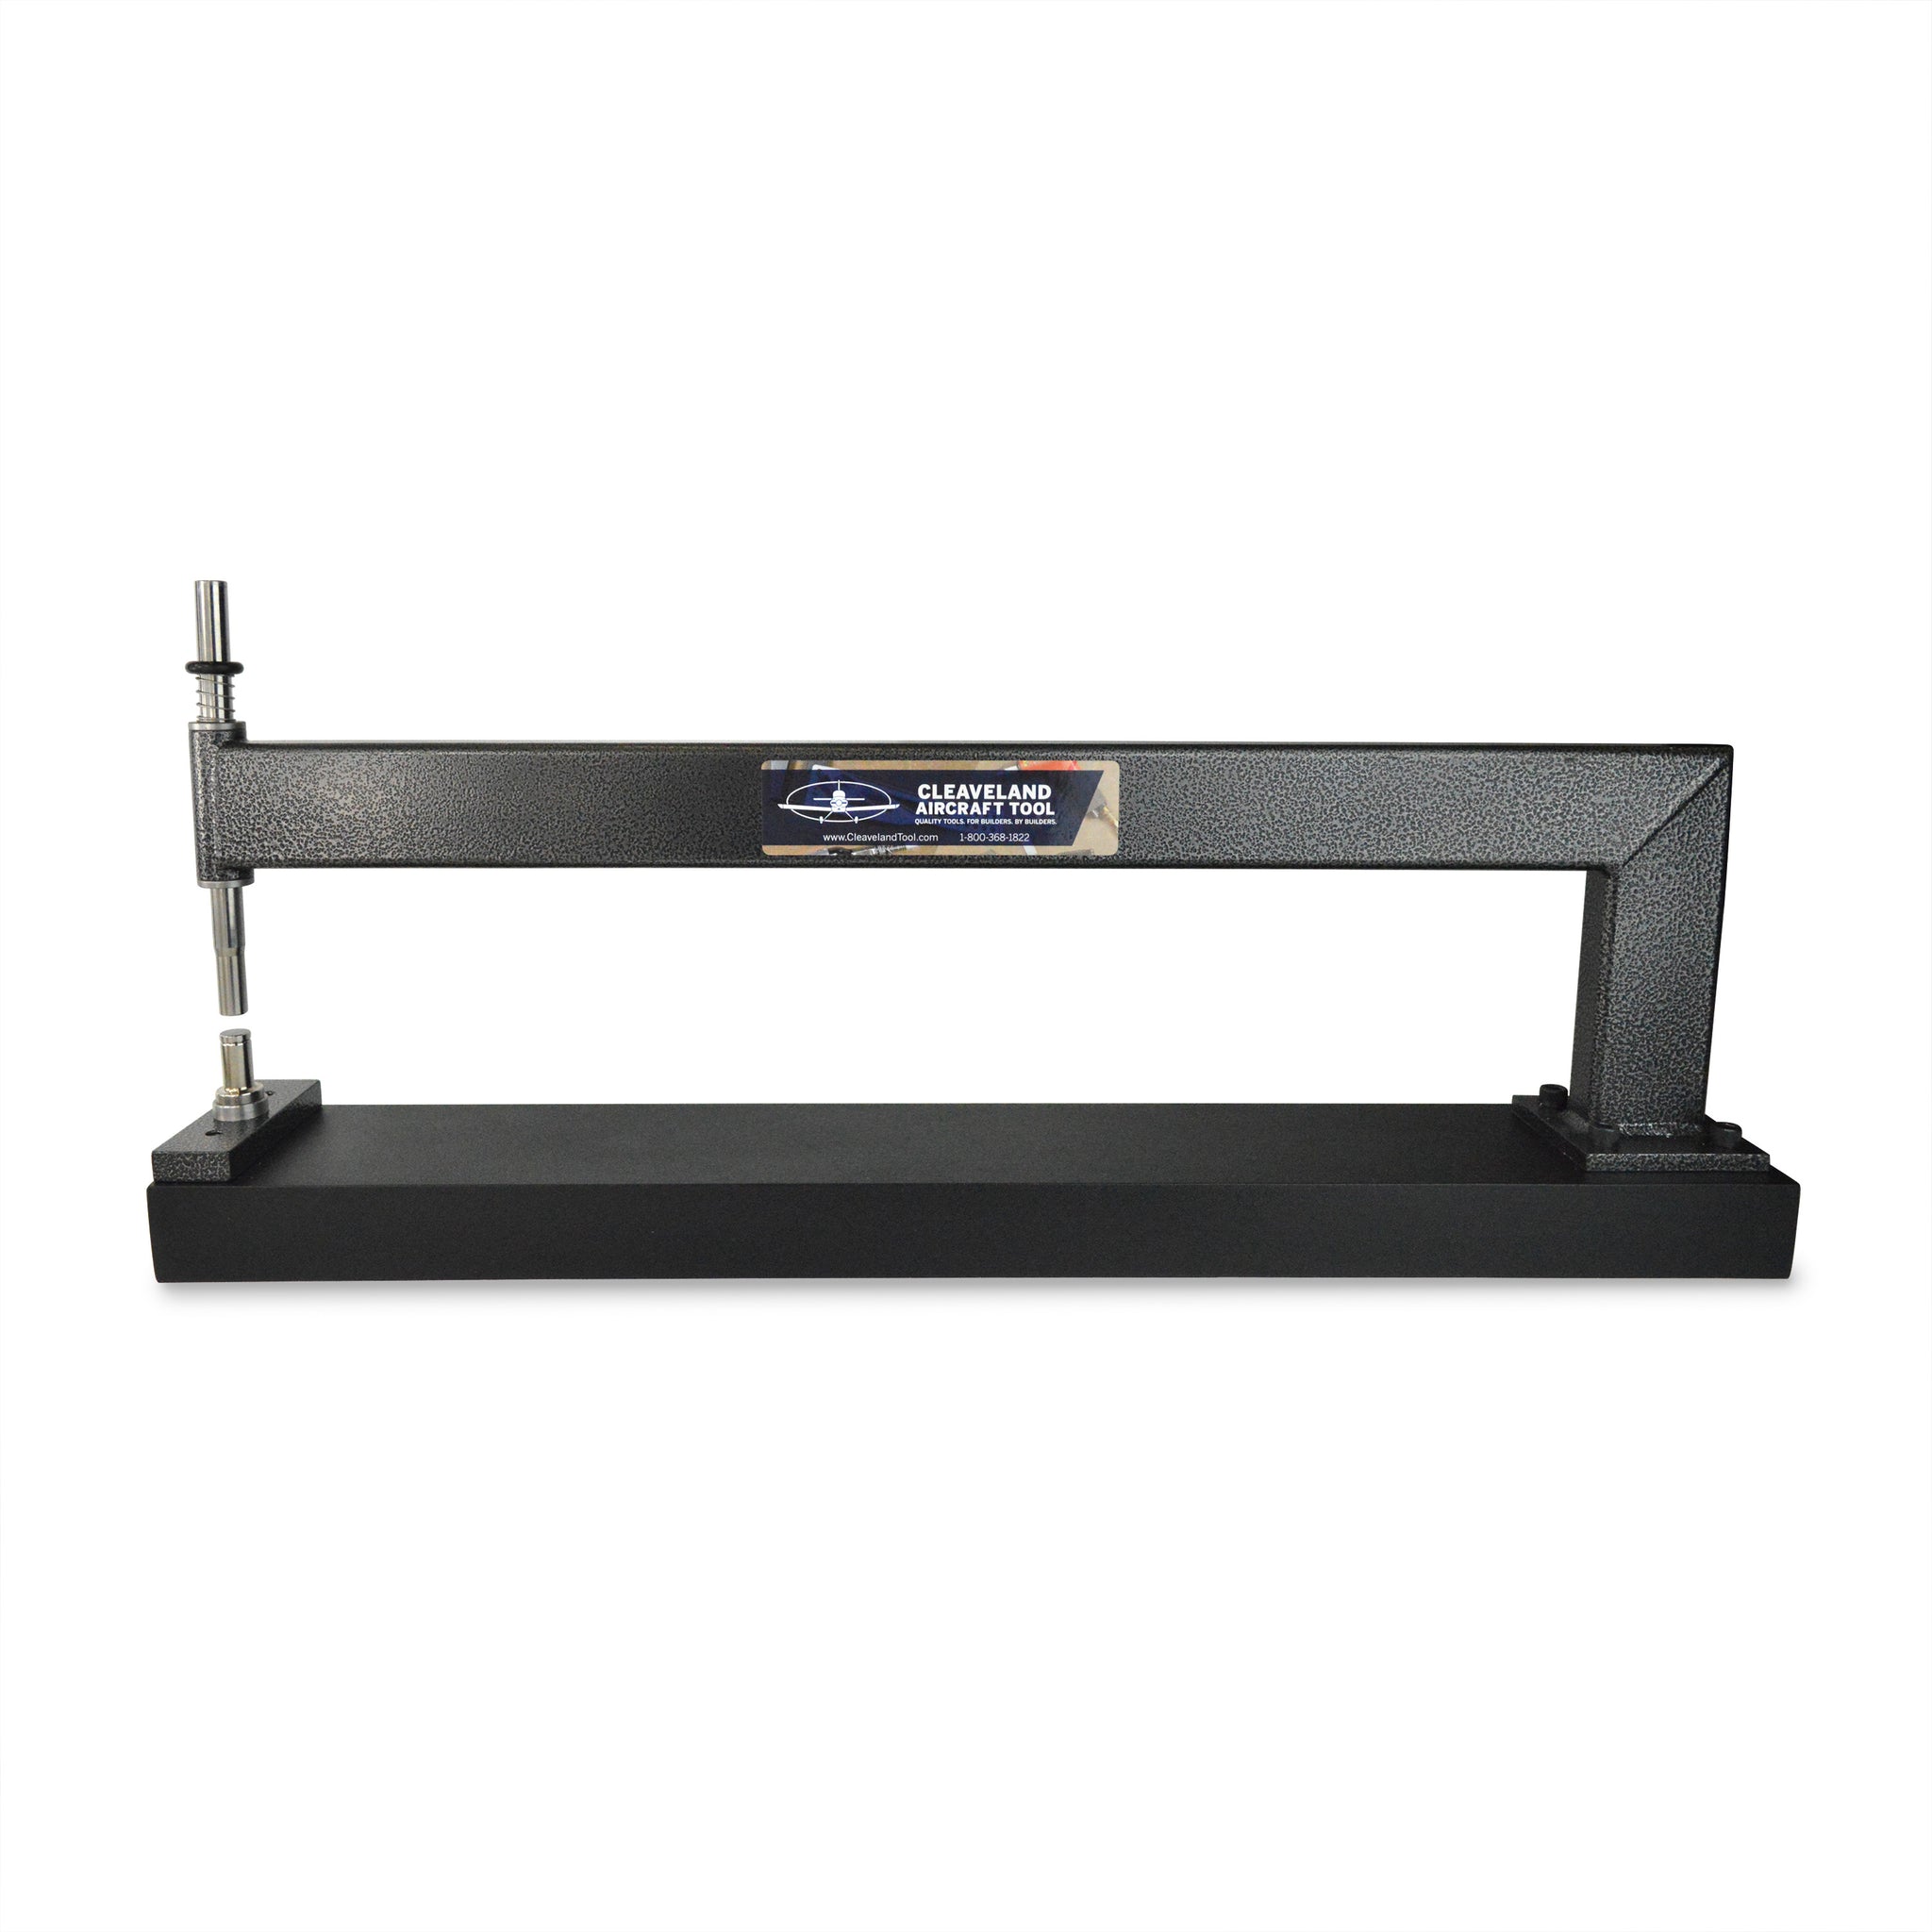
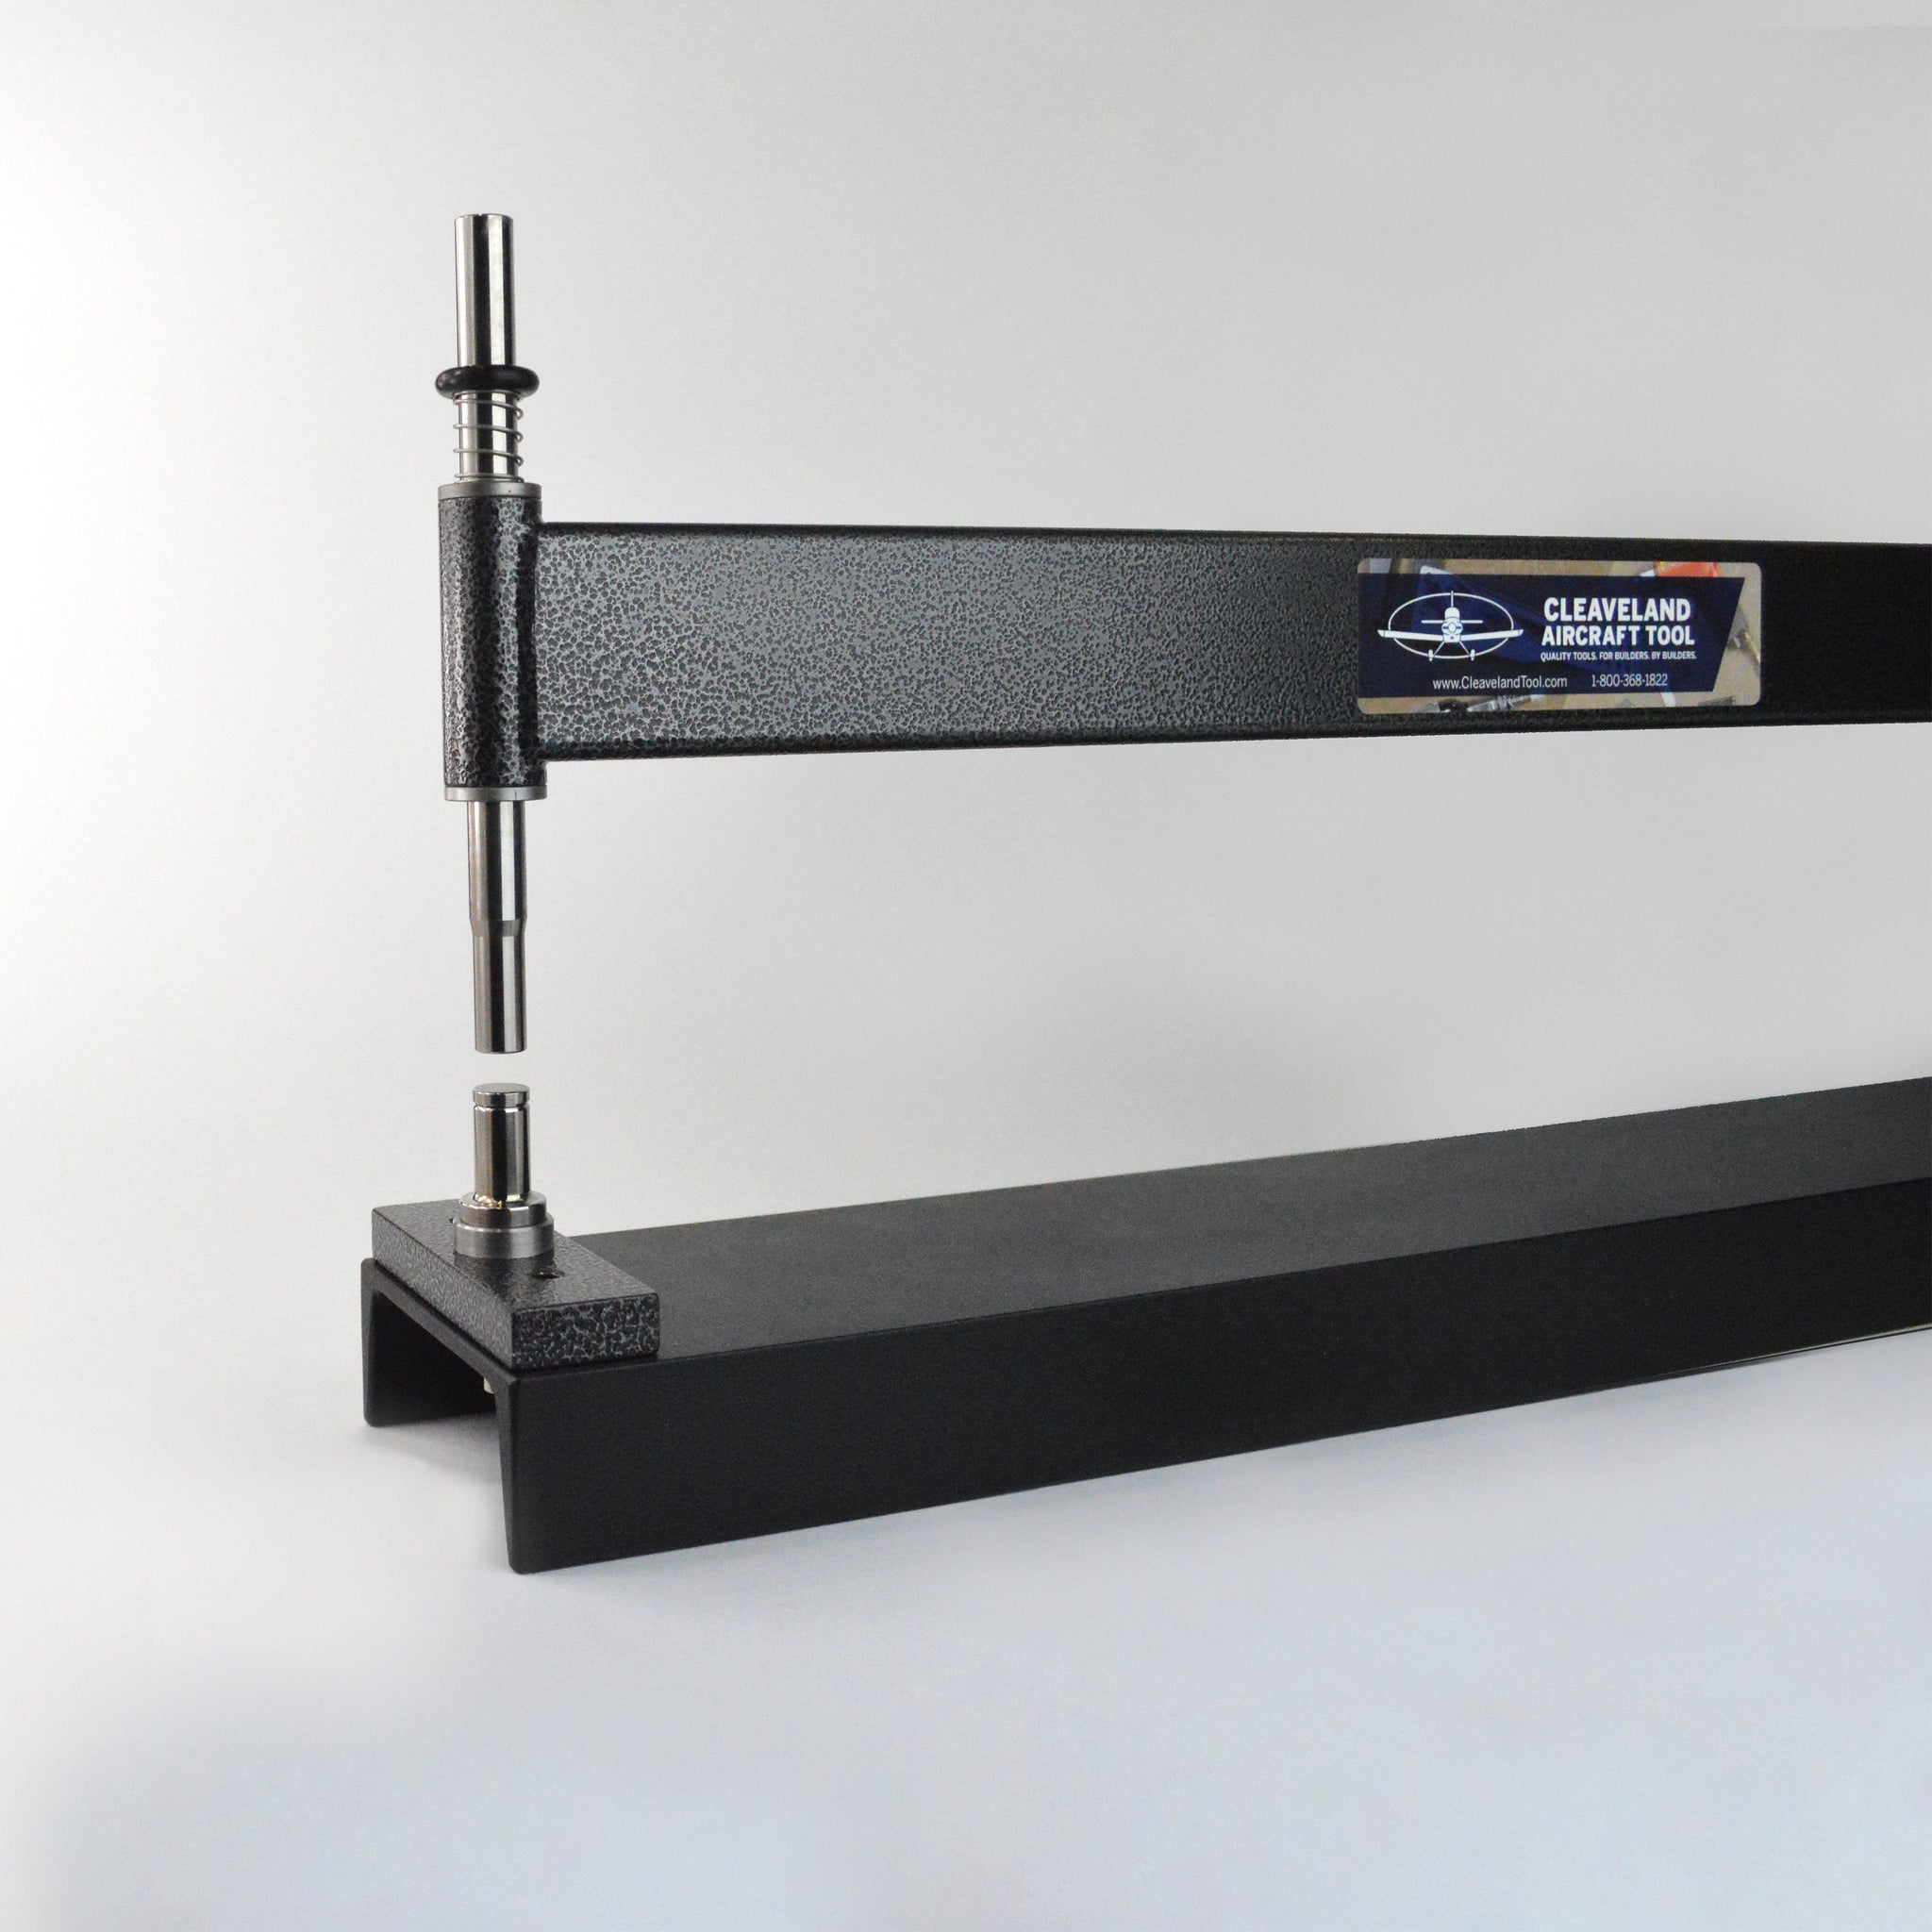
Cleaveland Aircraft Tool's C-Frame is a combination of the best features of several tools! It can be used for both dimpling and setting rivets. Its thoughtful design assures perpendicular placement of dimple dies and rivet sets to the skin's surface.
When to use the C-FRAME TOOL
- For dimpling of all control surfaces and internal areas of aluminum sheets
- For riveting stiffeners and hinge fittings to the wing and empennage spars, as well as other sub-assemblies
Features include:
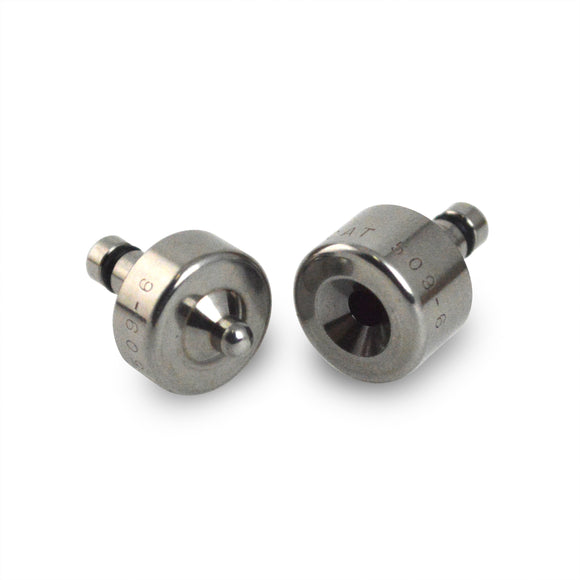
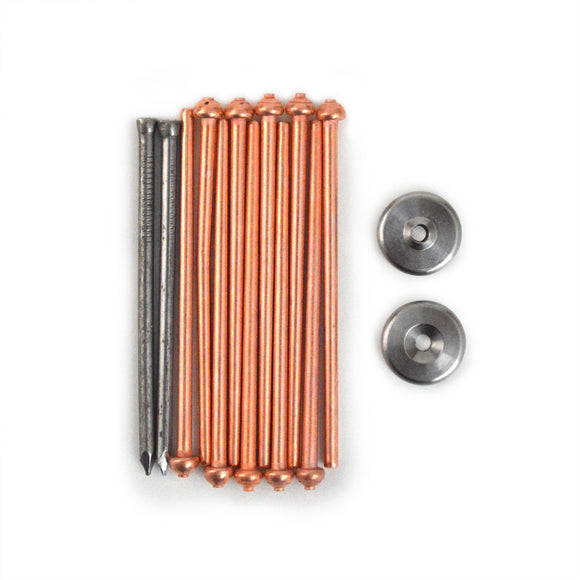
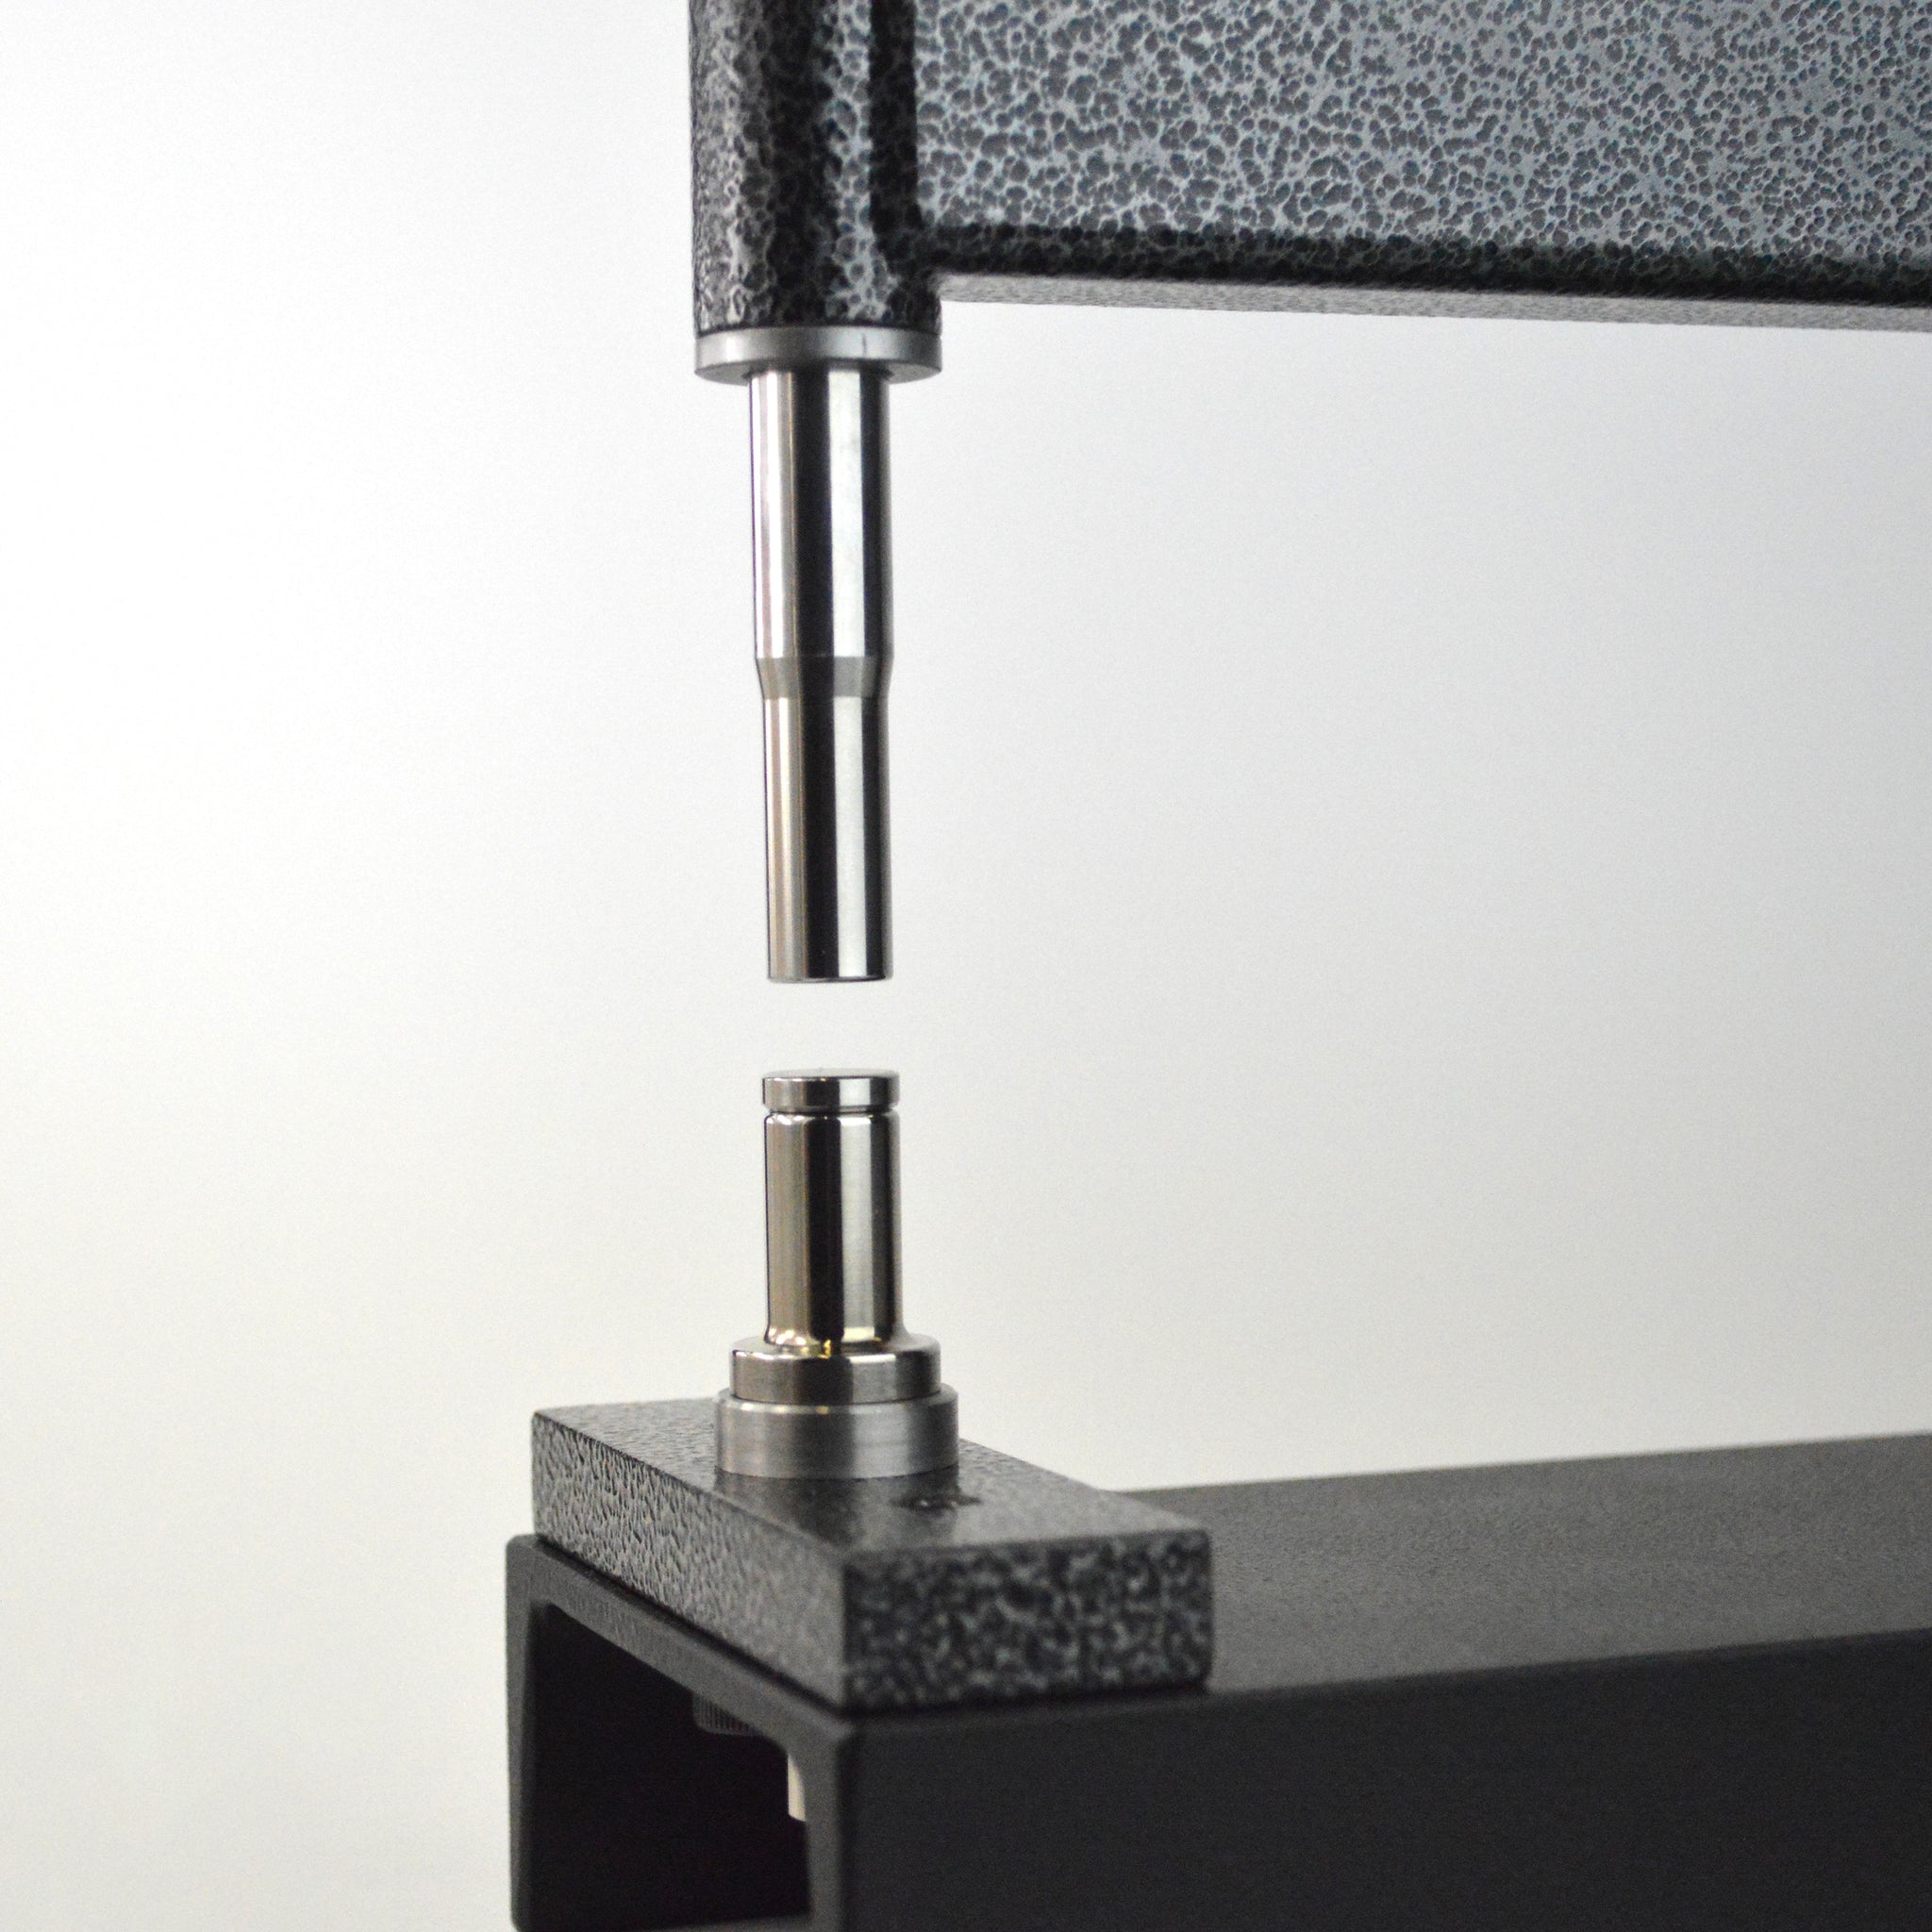
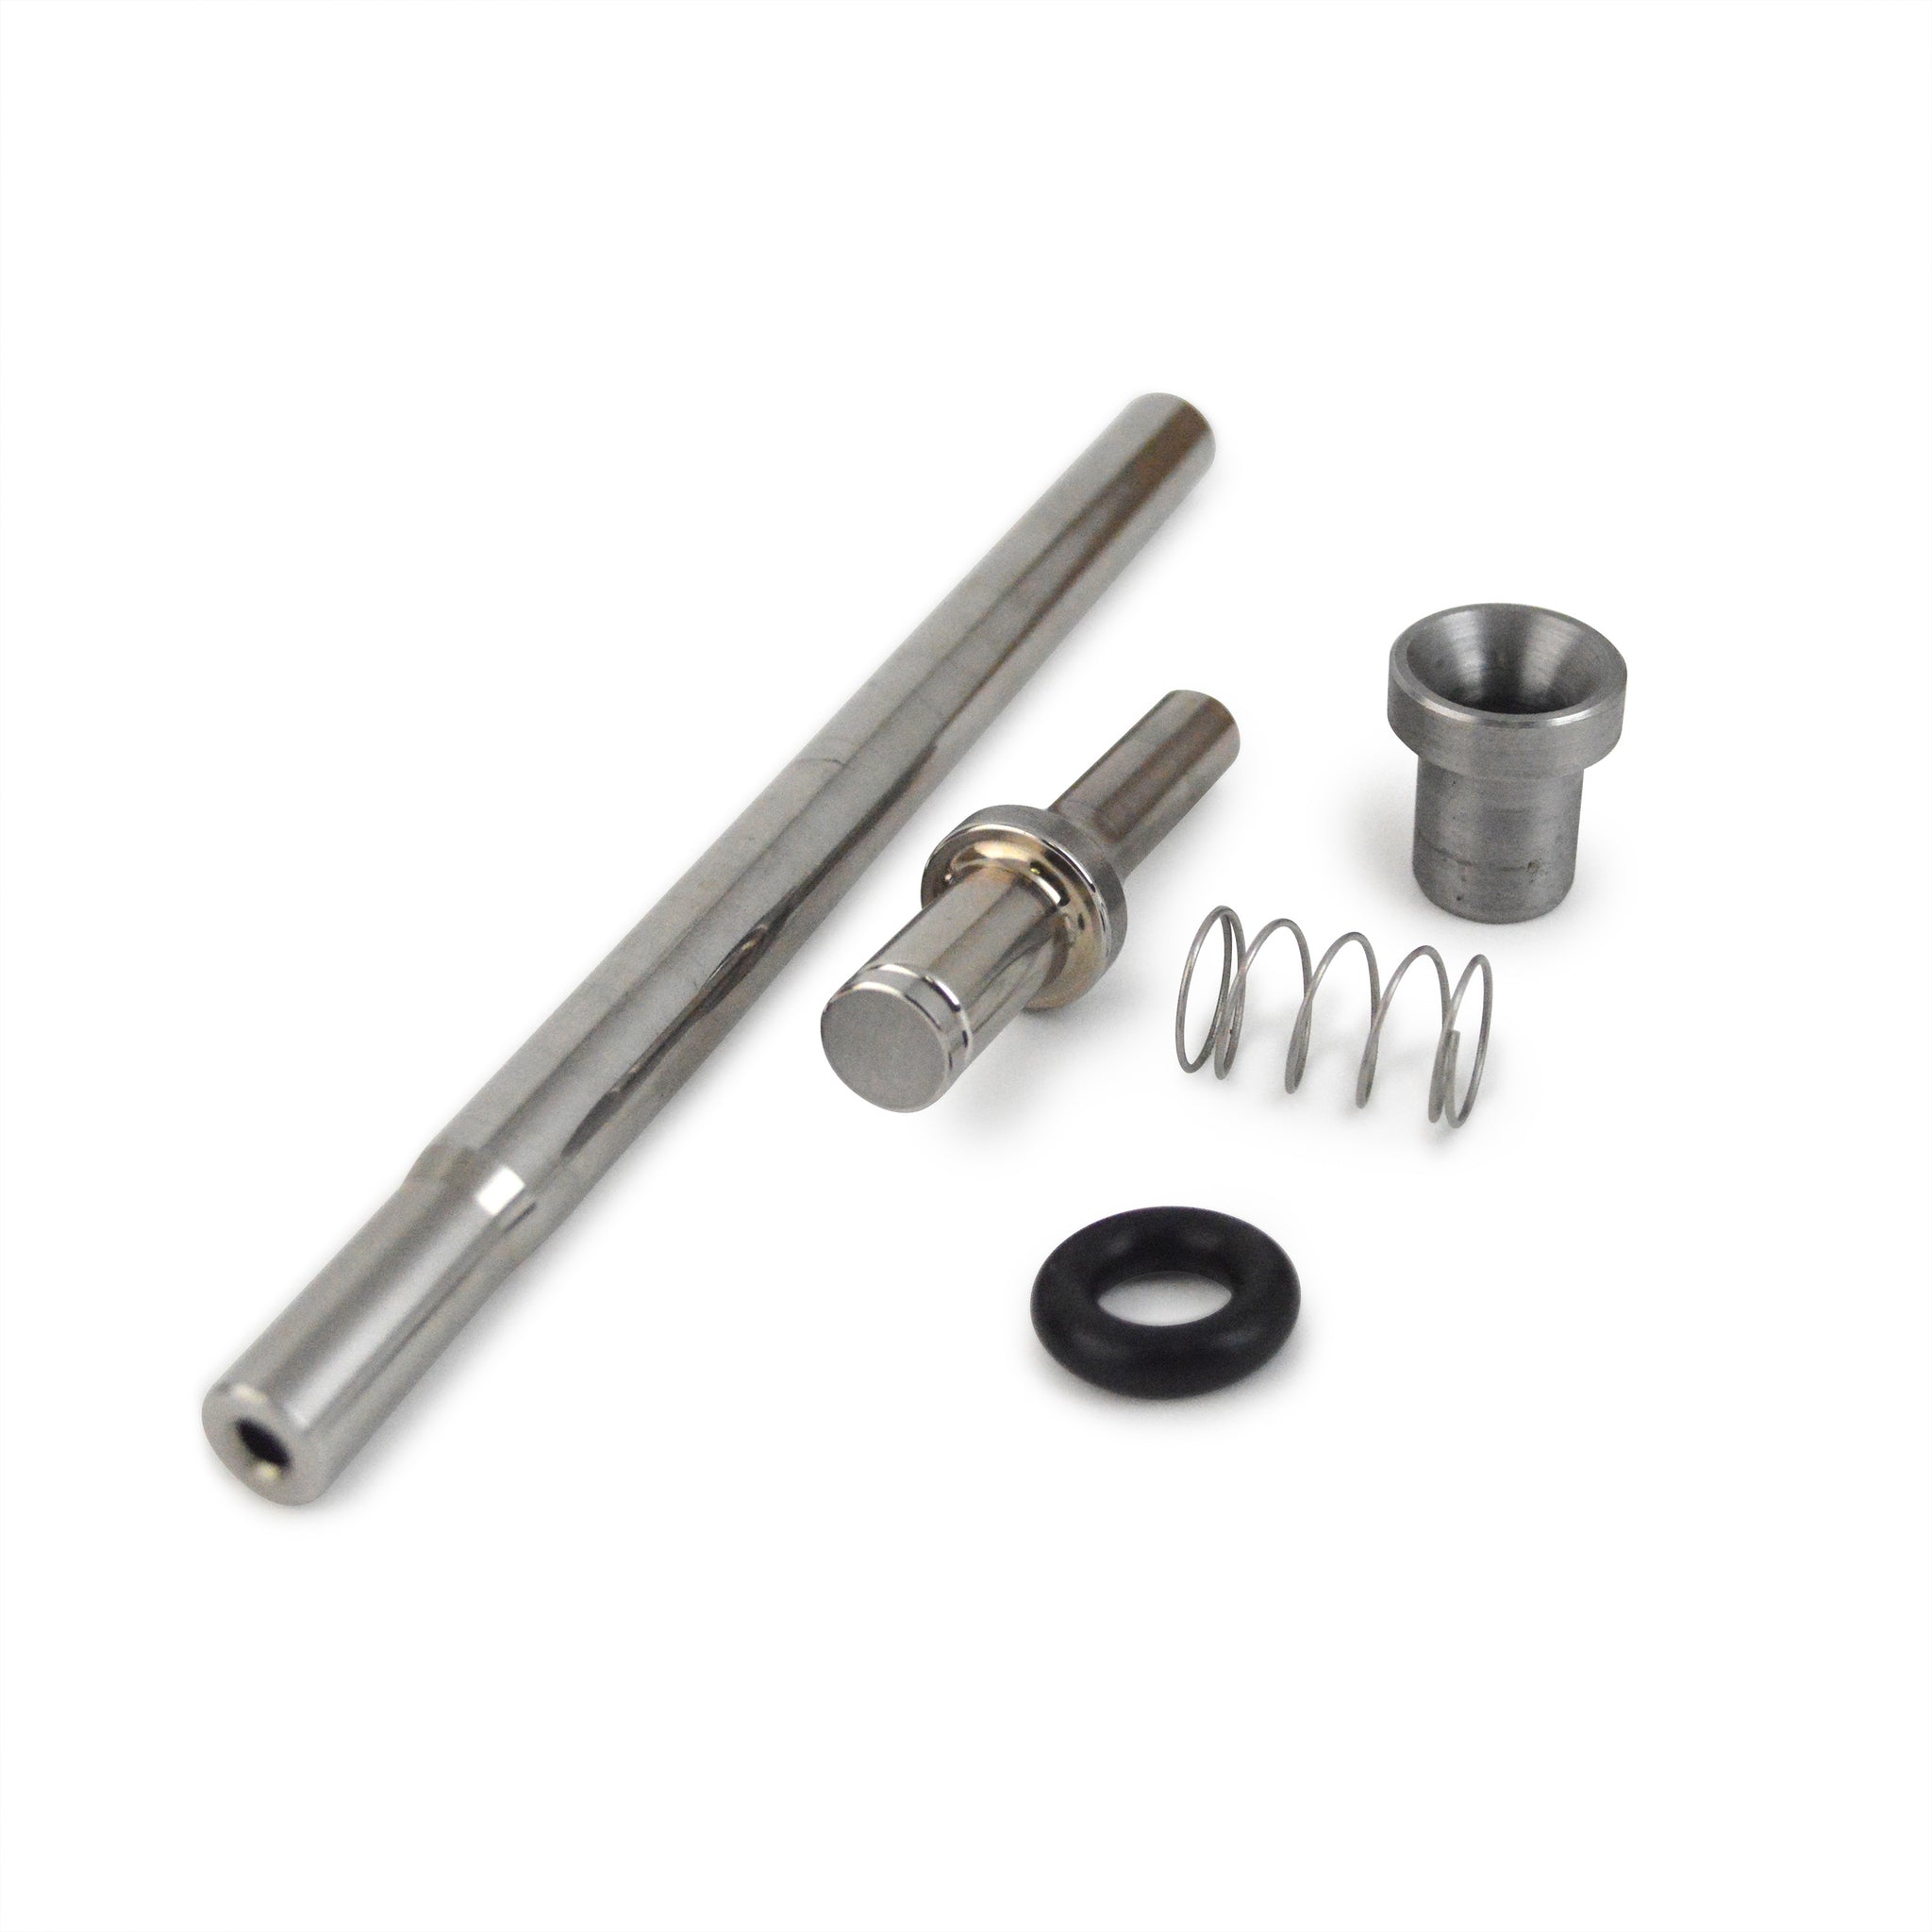
- Base with a floating socket that protects against shearing of dimple die pilots; socket accepts .401" standard shank tools, same as a rivet gun! (SKU: CF80-SCK)
- Set holder for dies and sets with 3/16" stems; has a .401" standard shank and can also be used in rivet gun; heat-treated stainless steel (SKU: CF80-RSH)
- Ram with set hole which also accepts dies and sets with 3/16" stems; heat-treated stainless steel (SKU: CF80-RAM)
- Arm capped with 1/2" ID sintered bronze bushings which are reamed to fit the ram for more accurate alignment
- O-ring and low tension return spring holds the ram off of the skin for positioning
- Replacement O-Ring available (SKU: CF80-RNG)
- Replacement Spring available (SKU: CF80-SPR)
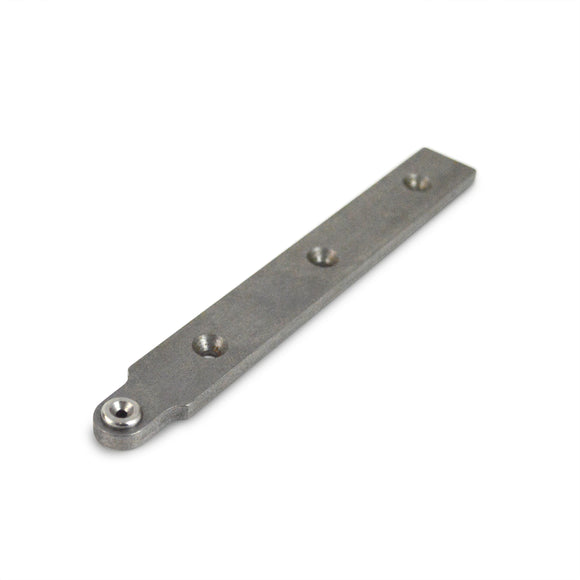
- Arm, base, and front plate (SKU: CF80-FPL) are powder coated separately to allow for adjustment and fine-tuning of arm and tooling alignment.
Additional details:
- 22" throat depth
- Base is 1.5" x 4" x 5/16" aluminum channel (powder coated)
- Arm is 1" x 2" x .120" steel tubing (powder coated)
- Includes prints for building your own carpet-covered wooden table top to provide a perpendicular work surface; also available online here (C-Frame table)
Related products:
- Long 12" back rivet set (SKU: RSB12)
- Avery C-Frame Fit-Kit (SKU: CF-AVERYKIT) for converting Avery brand C-Frames for use with our long 12" back rivet set
- Compression-type dimpling tool (SKU: DRDT2)
Former Cleaveland owner, Mike, talks about C-Frame usage on the Cleaveland YouTube Channel. He talks about this about 5 minutes into the video.
If you are an EAA member, you can also watch Wally Anderson demonstrate how to use the C-Frame on the EAA site.